
Cool things to do with cameras #72
Written by Mat
I'm always keen to learn a new skill, and when I saw my friend Tim's amazing star photographs on Instagram I decided to have a go! As long as you have the right kind of camera it's pretty simple, so I wanted to show how it works.
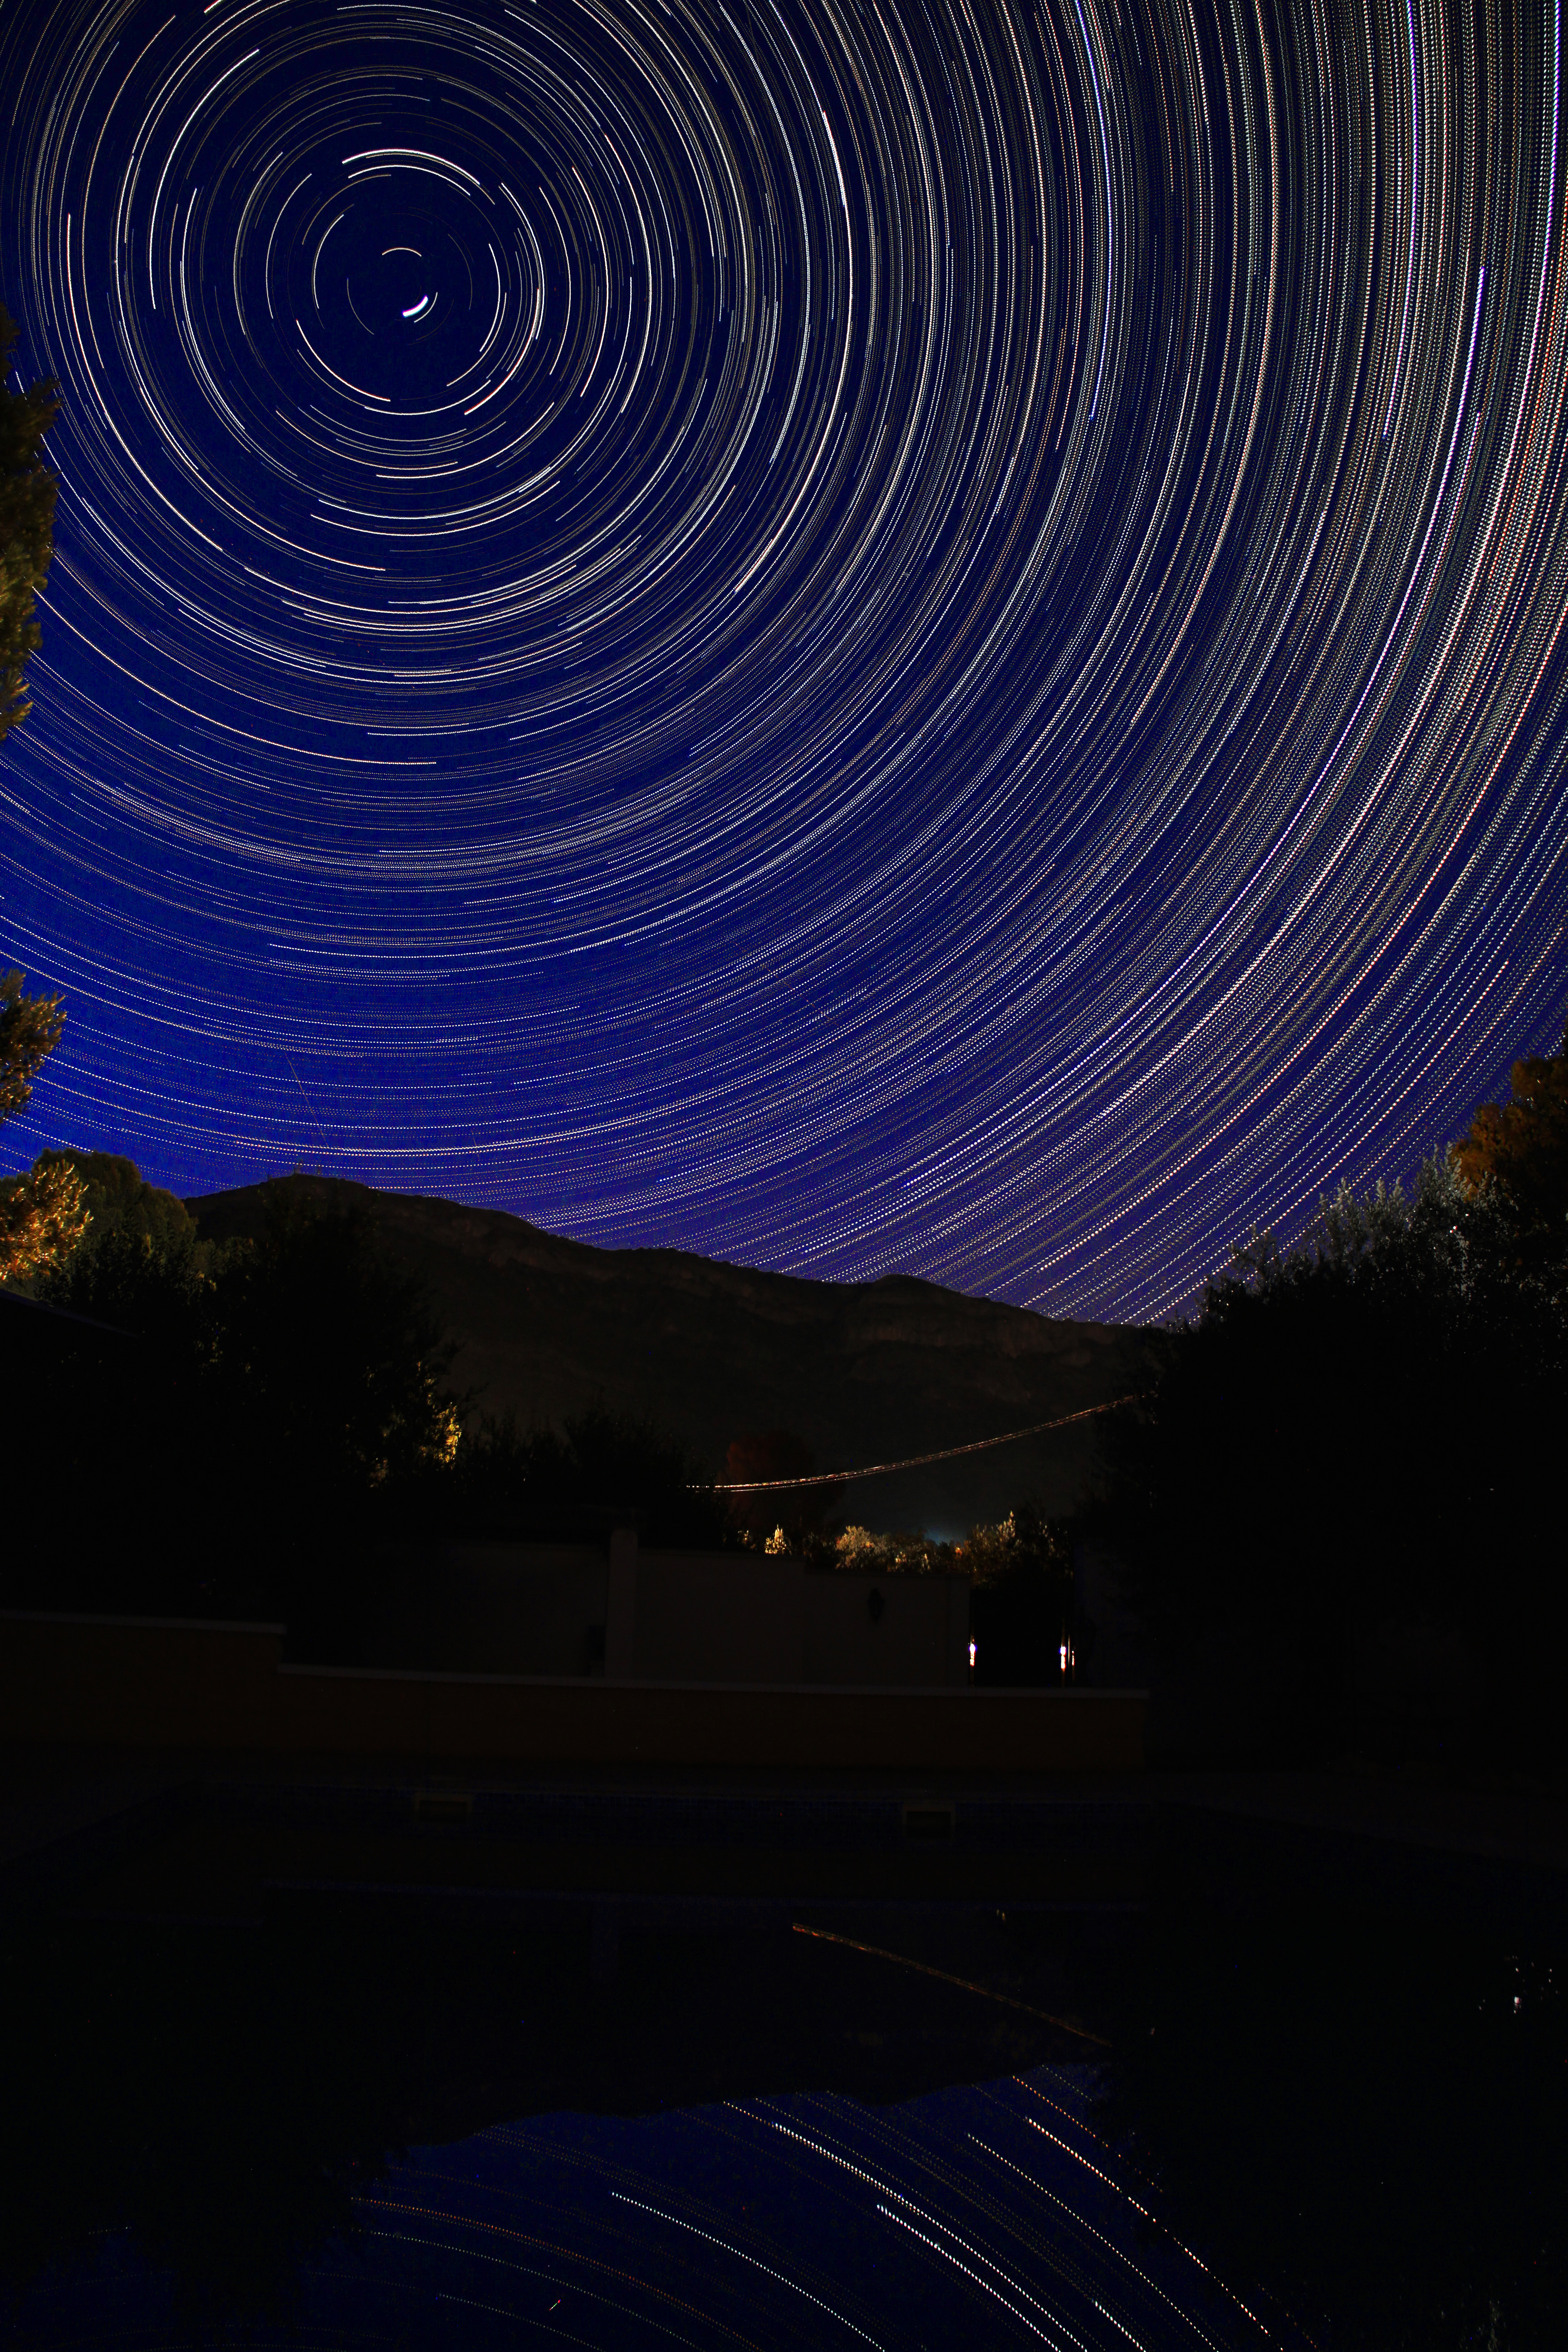
Here is a picture that I created from photos taken overnight on Friday, click to see it full size. Can you see the satellite and meteorites in the large version?
What is this?
It's a composite of 250 individual photos, taken over four hours in the middle of the night, in a very dark location in the mountains near Alicante. My camera took one photo per minute and then I layered them all together using a free piece of software called StarStaX.
Here's a video showing each individual photo one after the other. You can kind of see that the stars are rotating around a point in the top left. You can also see flashes where a car's headlights illuminate the scene. This video looks much better if you view it full screen.
Here's a video showing how StarStax stacks each image on top of one another to make the finished picture. Now it's really clear where the rotation point is - the closest star is Polaris, but the sky doesn't rotate exactly around that star. You can clearly see how the stars further from the centre move much more quickly. This video also looks much better if you view it full screen.
How to take the pictures
Taking these pictures manually every minute all night would get boring very quickly, so you'll either need a programmable camera or a way to trigger it remotely. I have an old Canon digital SLR so in order to programme it, I bought an intervalometer - a remote trigger that lets you tell the camera when to take pictures. I have this one but you'll need one that works with your camera. If your camera has an option for a remote trigger then it should be possible. Newer or more expensive cameras will have this functionality built-in.
Each picture was a 20-second exposure at f/3.5 and ISO 400. If that doesn't mean anything to you, then you just need to make sure that each image is exposed correctly so that you can just see the stars and not much else. If it's overexposed it'll be too bright to see the stars, and if it's too dark you won't be able to see them at all. You'll need a dark sky with little light pollution, where we live in Valencia the light pollution is terrible and you wouldn't be able to see anything.
You'll need a clear night to see the stars, and one with zero chance of rain - you're going to leave the camera outside overnight! If you're in a colder climate you might want to wrap the camera in a towel to keep it warm and dry. Set it up on a tripod in a safe location and make sure that you're pointing north - in the northern hemisphere the stars rotate around a point near to the pole star. Fully charge the camera's battery or hook it up to a charger if your camera allows.
Before you start, put the lens cap on your camera and take a couple of photos. This sounds a bit weird, but I'll explain why in a minute.
Finally, set the camera up, start it off and check the first few frames to make sure that everything is working and looks good. Now try to get a good night's sleep!
How to process the pictures
Hopefully, your camera is still there in the morning, bursting with photos just ready to be processed. Download them onto your computer, and then open the StarStax programme. Go to File -> Open Images and select all the pictures you took, except for the black ones with the lens cap on. It should look like the screenshot below:
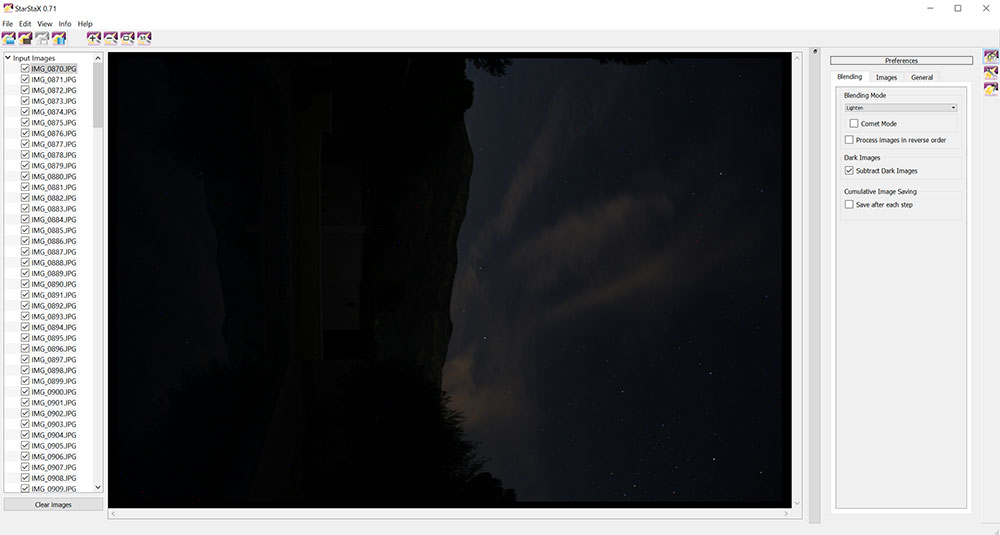
Next, go to File -> Open dark frames and choose the pictures that you took with the lens cap on. These images will be used to track if your camera has minor imperfections in the sensor which can otherwise lead to bright spots on your pictures. My camera is pretty old so there are loads of them.
Now you can go to Edit -> Start processing and watch the image appear before your eyes! On my computer, it takes about a minute to process 250 pictures. If you spot any sudden changes in the image you might want to remove individual frames.
Once StarStax has finished, you can go to File -> Save as and save your final image onto your computer. It'll probably be quite dark, so you might want to boost the brightness, contrast or saturation with your favourite image editor.
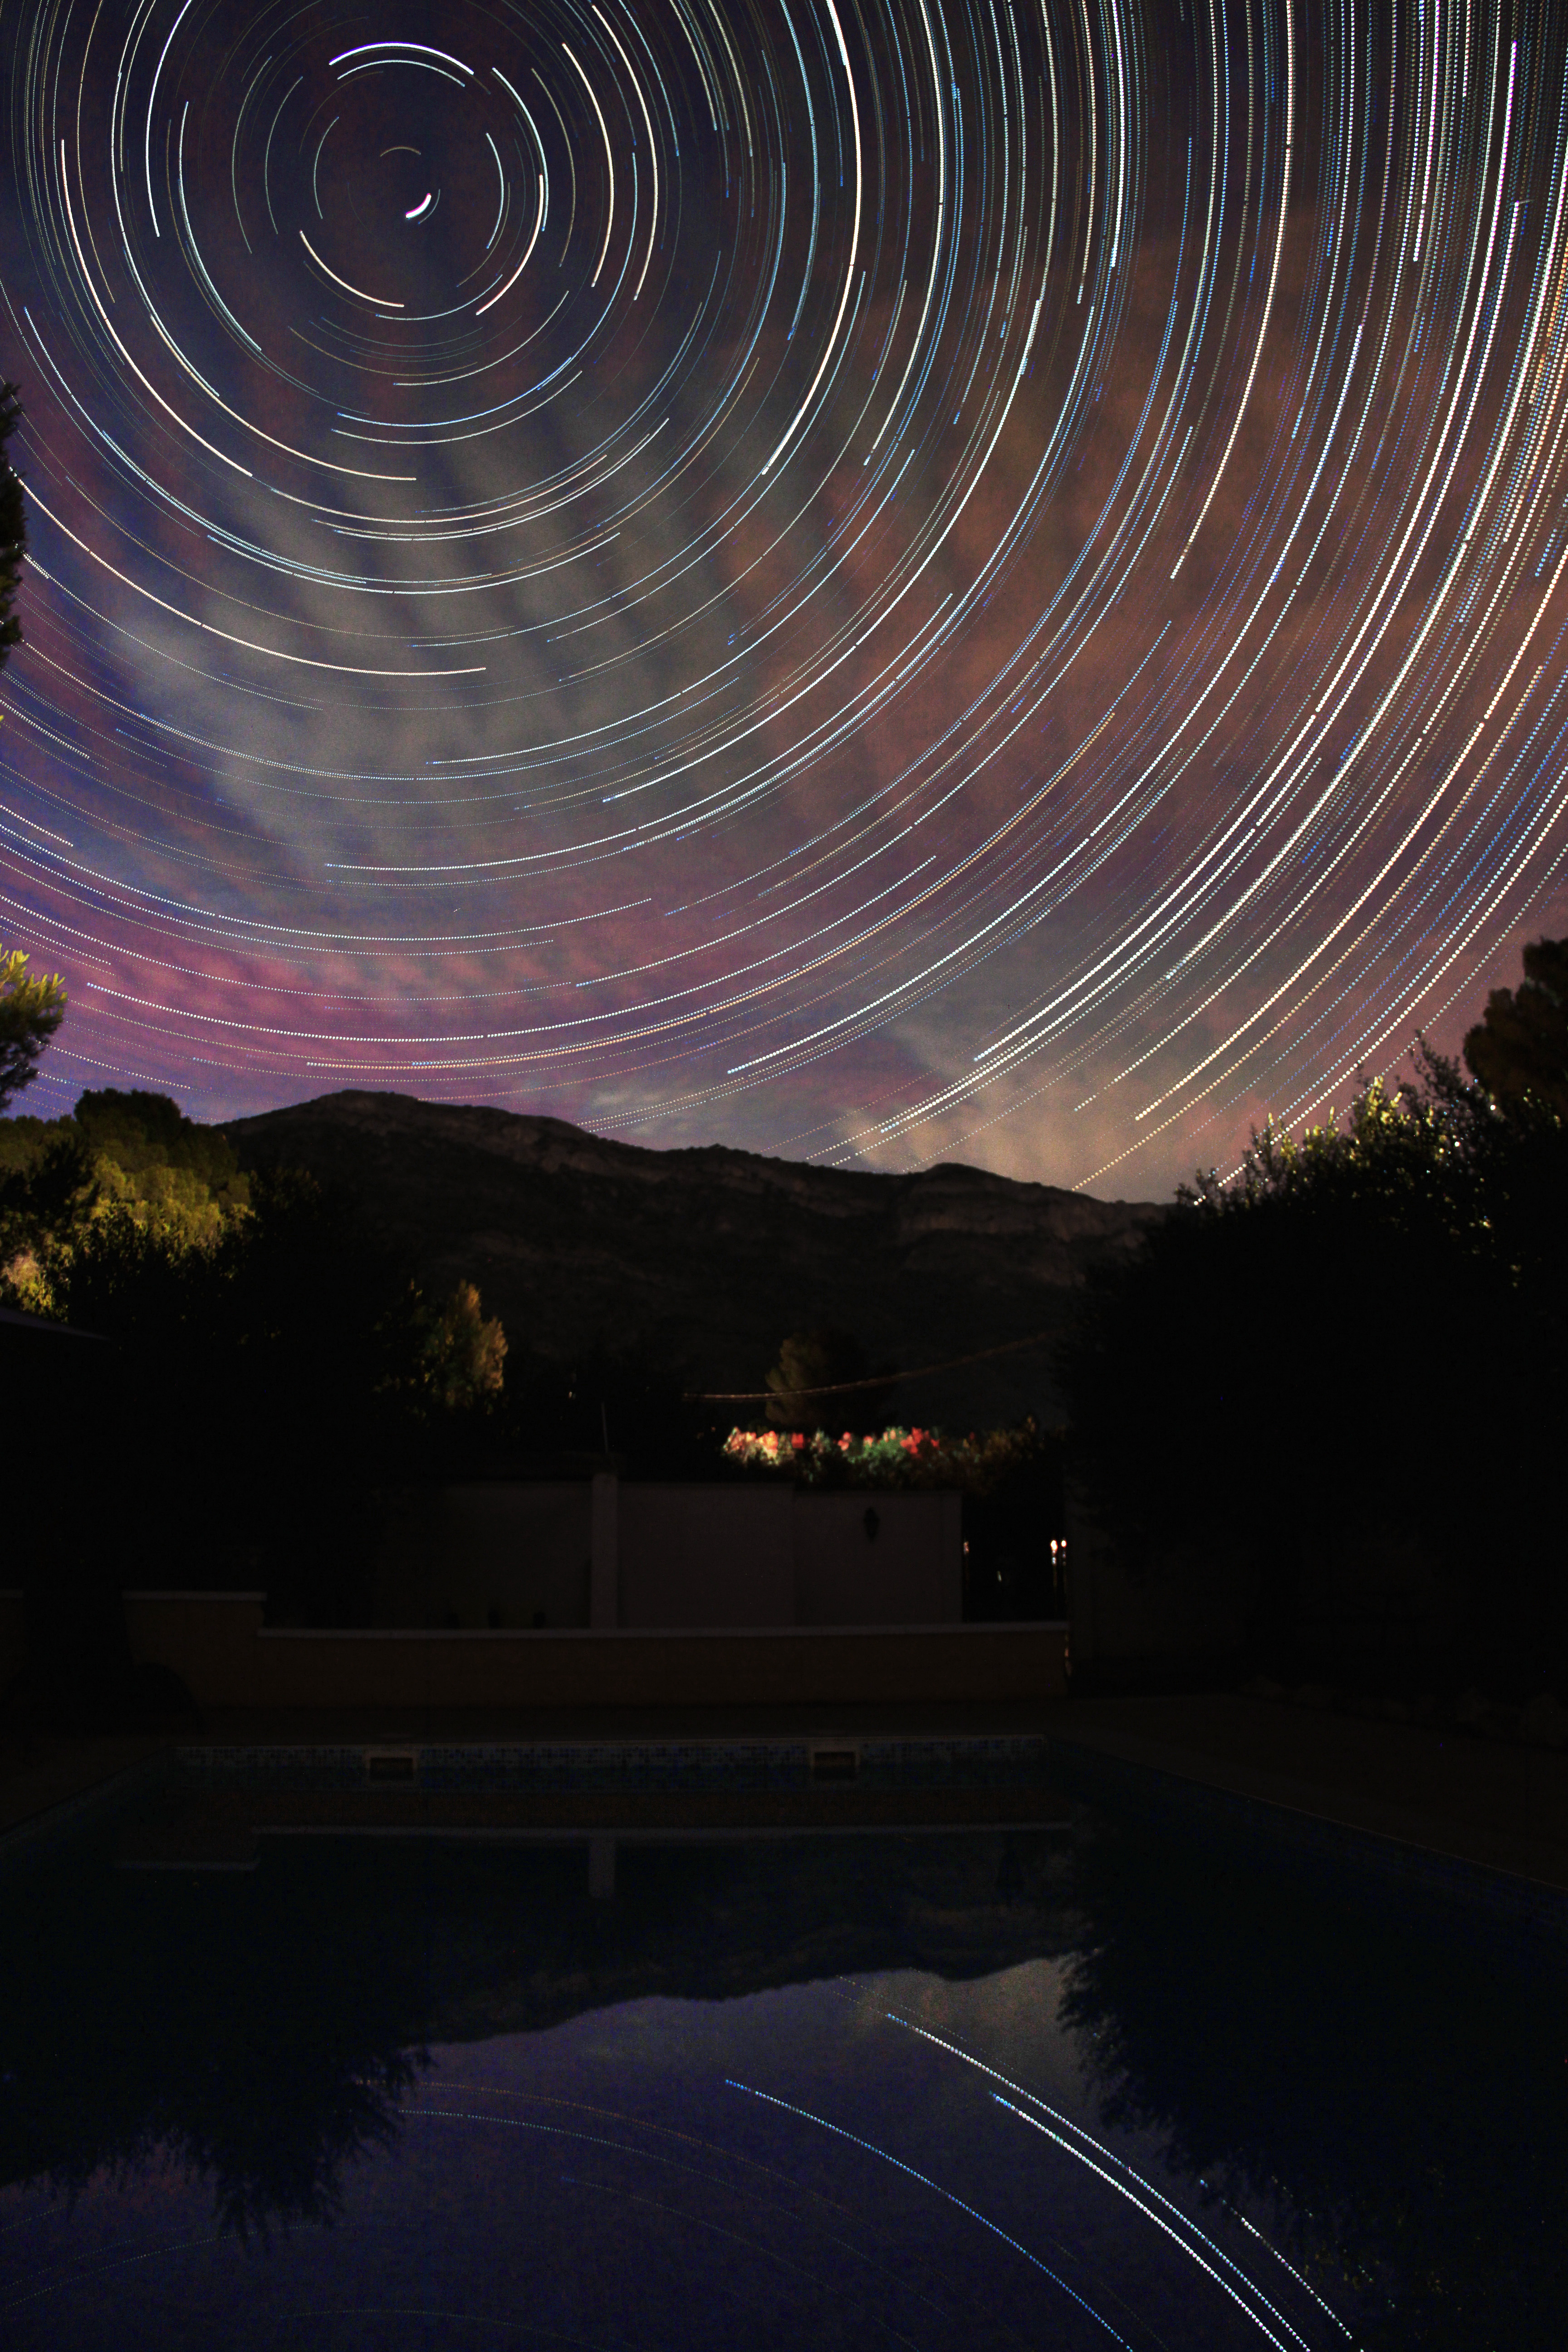
Here's a finished photo that I took overnight on Saturday. The clouds meant that fewer stars were visible, but the clouds add some beauty to the image. Click it to see the full-size image.
Summary
I hope this was an interesting introduction to star photography. It's not as hard as it looks, and the results will amaze you!
Give it a go, and please send us any images that you create :)
Tagged under: Photography Fun Leisure